
One of the first steps in getting started with penetration testing is naturally to install virtual machines of various operating systems. Although I was aware of how virtual machines work, I never had any real experience installing and running them before. Expecting this to be a simple and straightforward process, I ran into a fair number of issues along the way. This post will detail my experiences learning how to use virtual machines, the problems I faced and how I overcame them.
My first step was to download and install a virtual machine player with which to run the virtual machines. Settling on VMware Workstation Player (largely due to it being free), I then needed to download and install virtual machines.
Kali Linux
Kali Linux is a Debian-based Linux distribution, which features various pre-installed security tools. After downloading the version of Kali Linux recommended in Gerogia’s book, I was able to boot into Kali Linux for the first time. Success! Or so I thought…
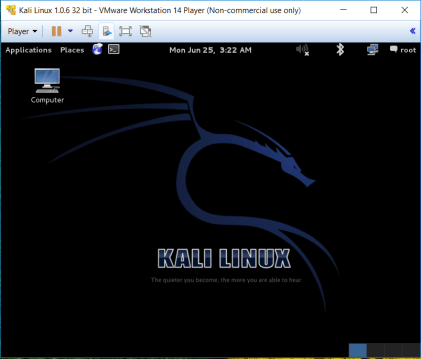
The initial view of Kali Linux after installation – At this stage I had no idea of the connection issues that lay ahead…
Things were going well so far, the ifconfig and ping commands appeared to all be working correctly. However, when attempting to download the application Nessus I was faced with my first error:

My first error message, no doubt it won’t be the last.
I wasn’t sure what could be causing this and it took me quite some time to figure it out (including multiple re-installs of Kali Linux). The internet connection seemed to be working fine, as I was able to load the Nessus download pages and ping various sites just fine.
I finally decided to try a speed test on the Kali Linux machine and found something out of the ordinary. The speed available on my Kali Linux virtual machine was far slower than what I was getting on my host OS.


A speed test comparison of Kali Linux and my host OS. The large difference in download speed didn’t seem quite right.
After an extensive amount of online research, I learned more about virtual machines and how they work on a technical level. Different types of Network adapters are used to

form a connection when using virtual machines: VMnet0, VMnet1 and VMNet8. A bridged networking connects a virtual machine to a network by using the network adapter on the host system. This means the virtual machine is treated in the same way as another node on the system, and will be provided it’s own IP address.
Looking in the Virtual Network Editor, the Bridged connection was initially bridging to ‘Automatic’ rather than specifying the Wi-Fi adapter on my laptop. After switching this option, the connection stabilized and my internet speeds matched what was received on my host OS. Success! Well, not quite…
Once I was able to download the latest version of Nessus, I began the installation process. On the final step to access Nessus, I ran into another dreaded error message:
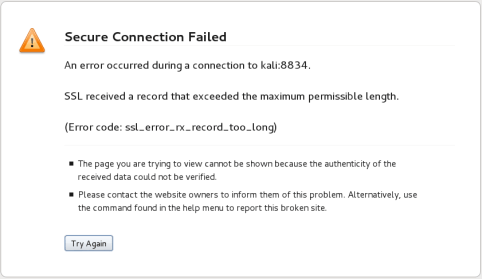
An error when attempting connecting to Nessus. I was so close!
As it turns out, the version of Kali Linux recommended by Georgia is incompatible with the latest version of Nessus. The only way to use Nessus was to install a virtual machine of a new version. Back to square one.
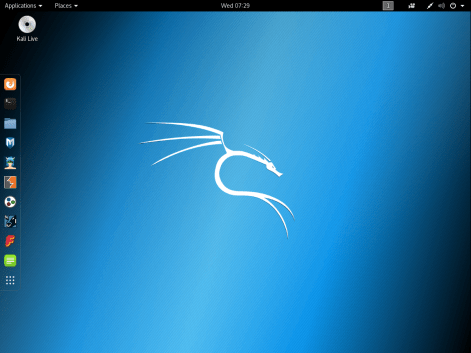
The latest version of Kali Linux. A significant upgrade in terms of graphical interface I must say.
I decided I had no choice but to bite the bullet and try again with the latest version of Kali Linux. Having learned my lessons from the previous version I was able to connect relatively easily, with the caveat of needing to increase the allocated RAM to improve performance.
This time around, I was able to download, install and run Nessus with no issues. Kali Linux setup complete!

After a few struggles, a successful Nessus install! I’m hoping it will prove to be worth the effort later down the line.
Ubuntu
In addition to Kali Linux, an installation of Ubuntu is also required. Thankfully this was relatively pain free.
Ubuntu successfully installed. The ease of installing this machine was a sight for sore eyes.
Windows 7 Service Pack 1
Again, this installation was straight forward. There are official virtual machines made available by Microsoft which helped. Installing BookService was an extensive process, but the instructions provided were straight forward enough to make the length of time the only real issue.


Screencaps of Windows 7 and BookService. Getting all my ducks in a row has been a long, but necessary process.
Windows XP Service Pack 3
This one took me on a brief nostalgia trip. The base installation of Service Pack 3 is used for various exploits and required quite a few extra installations and changes in settings.

Throwback to Windows XP. All virtual machines are now up and running!
Everything on this install went relatively smoothly, except for the downloads that used the site oldapps.com. For some reason, I was unable to download anything from this sight, regardless of if I was using my host OS or virtual machine. Changing browsers also had no effect, only producing the same issue. Searching around various forums, I found many other users reporting the same problem, of which there does not appear to be a solution. Because of these, I decided to skip the sections that required downloads from OldApps for now. When these files are required later on I will revisit the site and attempt to download them once more.
Overall, I learned a lot when setting up these virtual machines. Many of the installs required terminal commands and the modification of technical settings that gave me good insights into how they work. The various issues I dealt with was also a good lesson in ‘trying harder’, something I am sure I will need to use a lot of in the future.

Thank you for shharing this
LikeLike